
Your first photoshoot
Create your first AI model photoshoot in minutes: sign in free, upload a garment photo, choose a model, pose and background, then download your photos.
This guide shows you how to create an AI photoshoot in the ApparelAI web app, from signing in to your first model photo. All you need is one clear photo of a garment, such as a flat lay, a hanger shot or a mannequin photo. New accounts get free credits (the free plan includes 3 credits a month), and you don't need a credit card.
Each example below shows the garment photo (top left) and the AI model photo made from it:
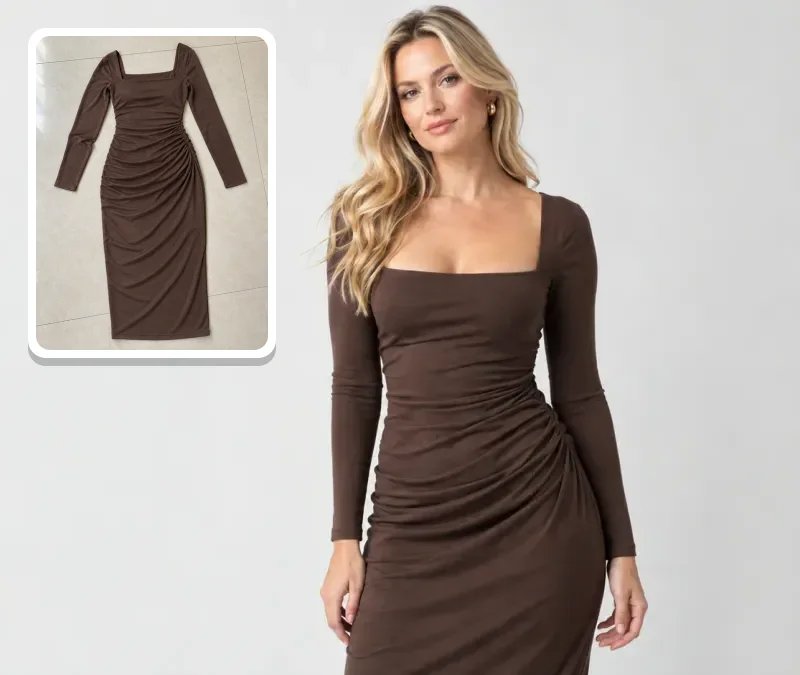
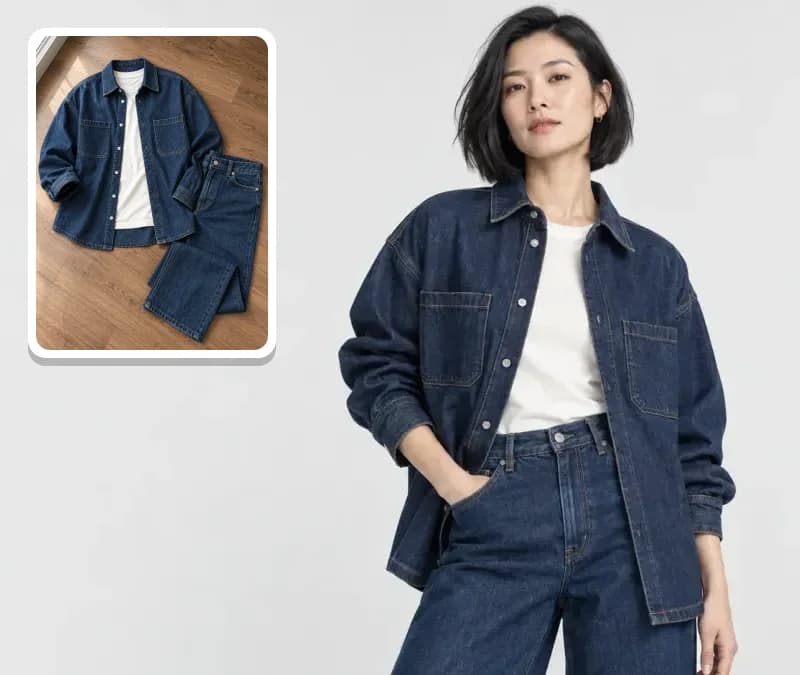
How to use ApparelAI, step by step
Sign in
Go to app.apparelai.studio and select Continue with Google, Continue with Microsoft or Continue with Apple. The first time, this creates your account. See Create an account and sign in.
Open ApparelAIStart a new photoshoot
In the sidebar, select New Photo Shoot. The Create Photo Shoot page opens with five steps: Product, Model, Pose, Background and Output. The Live Preview on the right shows your choices as you go.
Product: add your garment
Select Upload new product (front side) and choose a photo of the front of your garment: a JPG, PNG or WEBP file up to 25MB. If the back has its own design, add a photo under Back side (optional). It's used when you pick a back-view pose. Both photos upload when you select Continue.
Already uploaded the garment? Select it under All products instead, then select Continue.
If you've turned on a garment mode for sarees, salwar kameez or shirts, this step shows a photo slot for each part of the garment instead. See Garment modes.
Model: choose who wears it
Select one of your SAVED MODELS, or select Use our models to add one of the 50+ ready-made models from the Model gallery. To make your own, select Create New Model. See Choose a model.
Pose: pick one pose
Choose a pose, such as Front Standing, which is selected by default. Each photoshoot makes one photo in one pose. You can also upload your own pose or describe one in your own words. See Poses.
Background: set the scene
Choose a background. For marketplace listings, a plain studio background such as White Seamless is a safe choice. You can also upload your own background or describe one. See Backgrounds.
Output: choose the size and generate
Choose an Aspect Ratio (3:4 Portrait is selected by default) and a Resolution: Standard - 1K uses 1 credit, HD - 2K uses 2 and Ultra - 4K uses 3. The footer shows the cost as Est. N credits. With the free plan's 3 credits, you can make three photos at Standard - 1K.
Check the SHOOT SUMMARY, then select Generate Photo Shoot. A photo usually takes 30 to 50 seconds, and the Live Preview shows its progress. See Output settings.
Review and download
When your photo is ready, it opens on the Photo Shoot Result page. Compare it with your garment, then download it. See Download and export.
Selling on a marketplace?
Below the Live Preview, under MARKETPLACE, pick Myntra, Amazon, Flipkart, Ajio, Meesho or Nykaa Fashion, then one of its presets, such as Front or Back. The preset applies a recommended pose, background, aspect ratio and resolution for that marketplace. See Marketplace presets.
Check the details before you publish
AI results can vary in color, weave, fit, drape and small details. Before you list a photo, compare it with your actual product, especially logos, embroidery, borders and stitching.
If a photo is almost right
You can describe a fix in plain words and keep everything else in the photo the same, or shoot it again with a different model, pose or background. See Edit and improve results.
Other ways to start
- From the Products page: select Shoot on any product to open Create Photo Shoot with that product already selected. See Product library.
- From Templates in the sidebar: find a ready-made look and recreate it with your own product and model. See Photoshoot templates.
- From your own Shoot Templates: saved settings appear at the top of the Product step, so you can reuse a look in one click. See Shoot templates.
- For many garments at once: Bulk Photoshoot takes up to 50 products in one batch, with up to 10 photos per product. See Bulk photoshoot.
- From your phone: the iOS and Android apps let you create photoshoots too. See Using the mobile app.
Related
ApparelAI documentation
Step-by-step guides for ApparelAI: turn garment photos into AI model photoshoots, fashion videos and marketplace-ready catalog images on web, iOS and Android.
How credits work
How ApparelAI credits work: what photos, edits, AI tools and videos cost, where to see the cost and your balance, and what to do when you run out of credits.