
Add your logo and text with Brand Kit
Add your logo to product photos with Brand Kit: save your brand logo once, add text in any color, drag everything into place and save it into the photo.
Use Brand Kit to add your logo to product photos you've made in ApparelAI, and to add text such as your brand name or a launch message. Save your brand's name and logo once, then place them on any of your photoshoot photos, drag them where you want them and save them into the image.
Brand Kit is on the Photo Shoot Result page, the editor where every finished photoshoot opens. You won't find it in Settings or the sidebar. These steps are for the web app. No credit cost is shown anywhere in Brand Kit.
Open ProjectsOpen Brand Kit
Open the photo in the editor
Open the photo on the Photo Shoot Result page. For an older shoot, click Projects in the sidebar, open the project and click Edit in Studio. See Edit and improve results.
Click Brand Kit
In the toolbar above the photo, next to Generated, Side by Side and Original, click Brand Kit. Brand Kit opens in place of the photo viewer.
To save your logo for reuse, start with the highlighted New brand under Your brands.
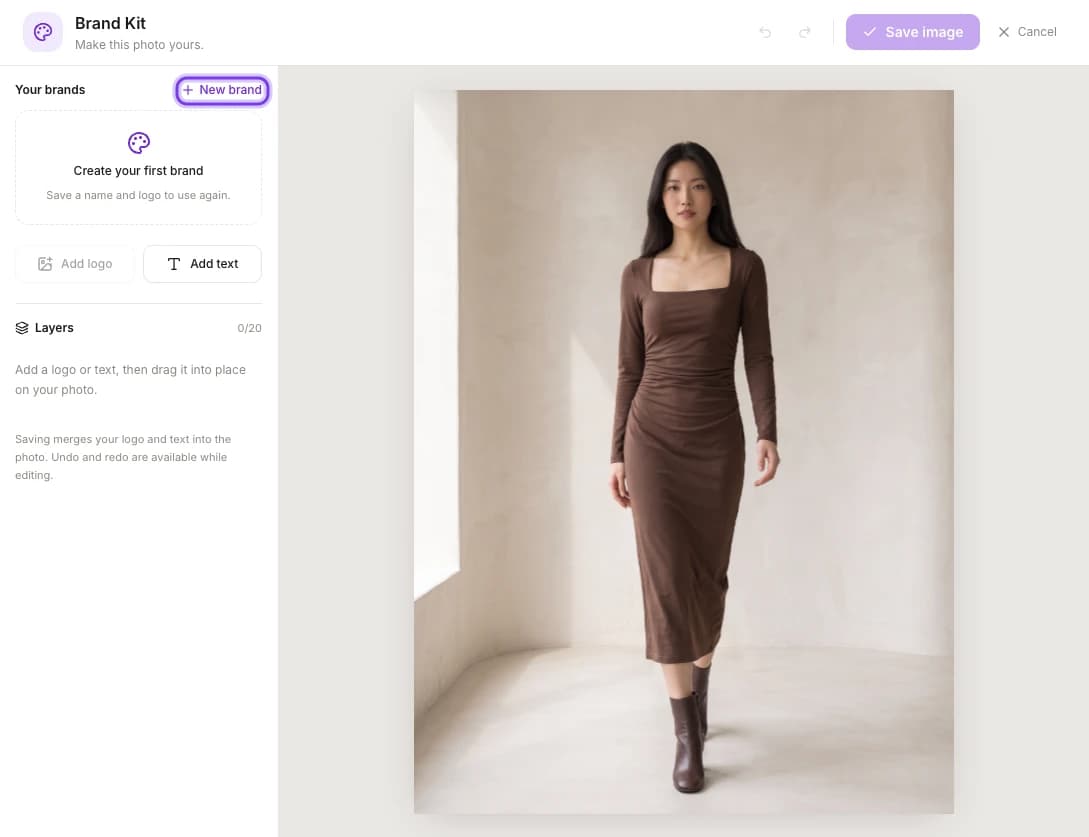
Create a brand
A brand is a name and a logo that you save once and use again on other photos.
Start a new brand
Under Your brands, click New brand. The Create a brand form opens.
Name it
Enter a Brand name, for example "Studio Meera".
Upload your logo
Click Upload a logo and choose a PNG, JPG or WebP file of up to 10 MB.
Save the brand
Click Create brand. It's available once the form is filled in. To close the form without saving, click the × in its corner.
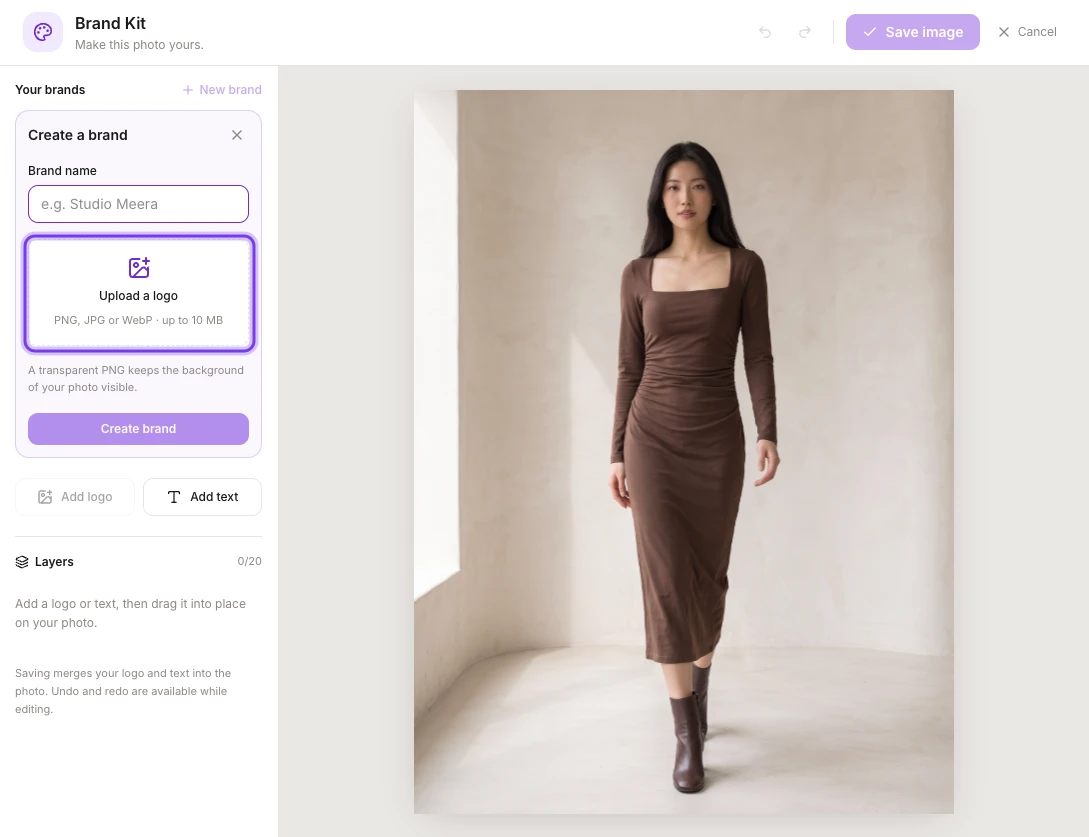
Use a transparent PNG
A logo saved as a PNG with a transparent background keeps your photo visible around the logo. A JPG can't be transparent, so its background shows as a box on your photo.
Add your logo
Click Add logo to put your brand's logo on the photo, then drag it into place. Add logo is available once you have a brand with a logo.
Add text to your photo
Click Add text. A text layer that says "Your text" appears on the photo, with a box and corner handles, and it's added to Layers. Change it under Text settings:
| Setting | What you can do |
|---|---|
| Text | Type your text. It can have more than one line |
| Font | Arial (the default), Georgia, Verdana, Trebuchet MS or Courier New |
| Size | 8 to 2400. The size is in pixels of the photo, so the default of 32 is small on a 2K photo |
| Bold and alignment | Make the text bold, and align it left, center or right |
| Text color | Click one of the 16 swatches, such as White, Black, Ivory, Gold, Burgundy or Navy, use the color picker, or type a hex code. White (#FFFFFF) is the default |
| Opacity | 0 to 100%. Lower it to let the photo show through |
| Width (px) and Height (px) | The size of the text box, up to the size of the photo |
| Center on photo | Moves the layer to the middle of the photo |
To move the text, drag the highlighted box on the photo. To resize it, drag a corner handle.
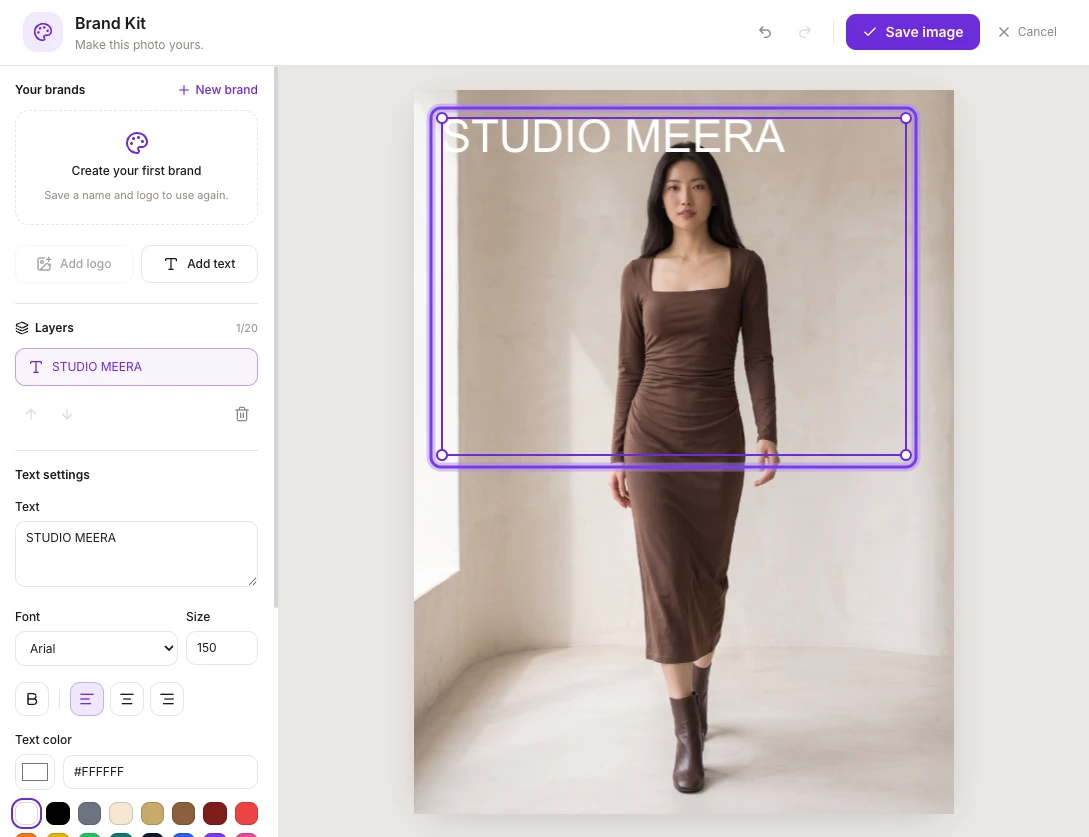
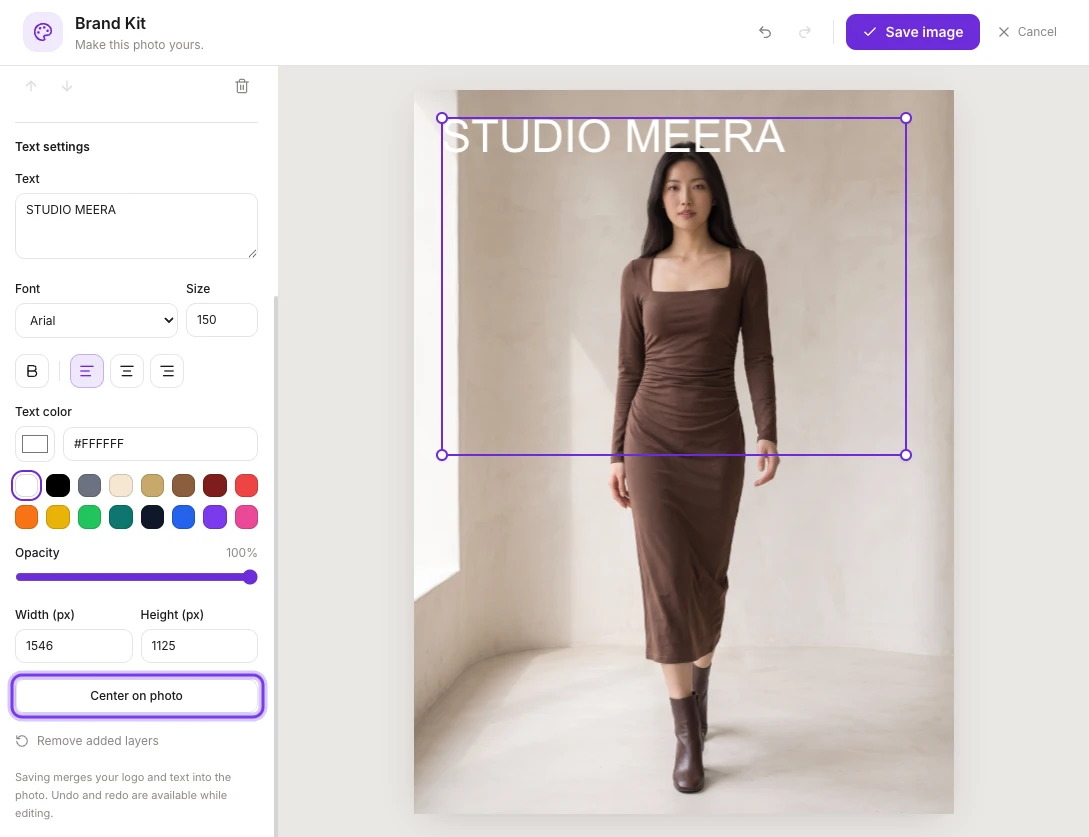
Place and arrange your layers
- Move: drag a logo or text on the photo. To put it in the middle, click Center on photo. There are no preset corner positions.
- Resize: drag the corner handles, or type a Width (px) and Height (px).
- Stack: select a layer in Layers and use the up and down arrows to bring it forward or send it backward.
- Delete: select a layer and click the trash button under Layers. Remove added layers removes every layer you've added.
- Undo and redo: while you edit, use the undo and redo arrows at the top of Brand Kit.
You can add up to 20 layers to a photo. Layers shows how many you've used, for example 1/20.
Save the image
Click Save image at the top. It's available once you've changed something. Saving merges your logo and text into the photo.
To leave without saving, click Cancel. If you have unsaved changes, Brand Kit asks "Discard your edits?". Click Discard edits to leave, or Cancel to keep editing.
Tips for logo placement on marketplaces
- Some marketplaces don't allow logos, text or watermarks on the main product image. Check your marketplace's image rules before you add a logo.
- Download the photo before you add your logo, so you also have a clean copy. See Download and export.
- Keep the logo and text off the garment, so they don't hide details buyers want to see.
- For a subtle watermark, use white text and lower its Opacity.
Frequently asked questions
Open the photo on the Photo Shoot Result page and click Brand Kit. Create a brand with your Brand name and logo, click Add logo, drag the logo into place and click Save image. The brand is saved, so you can add the same logo to other photos.
Yes. In Brand Kit, click Add text, type your text and set the Font, Size, Text color and Opacity under Text settings. Drag the text into place, then click Save image.
Upload a PNG, JPG or WebP file of up to 10 MB. A PNG with a transparent background works best: a JPG can't be transparent, so its background shows as a box on your photo.
No credit cost is shown anywhere in Brand Kit. For what does use credits, see How credits work.
Yes. Add your brand name with Add text, make it white and lower its Opacity so the photo shows through. Some marketplaces don't allow logos, text or watermarks on the main product image, so check their rules first, and download a clean copy before you add one.
Related
Create poses from a photo
Change the pose of a photo without a reshoot: pick up to 10 preset or custom poses, keep the same model, garment and background, and see the cost first.
Bulk photoshoot
Shoot your whole catalog with AI: add up to 50 products, apply one model, pose and background set to all, approve the first photo, then generate the rest.